Wow, hello again, it’s been a while!
I could start off this post listing all the excuses I’ve been giving myself as to why I’ve not posted sooner, but I’ll skip all of that. Truth be told had I really wanted to write, I would have. But because I’m the kind of person who needs everything around me to be conducive to the activity I’m about to engage in and everything around here: school holidays, building works, broken laptop really wasn’t I just couldn’t make myself sit down to blog. Any spare moment I had I just used to knit and try and forget the chaos going on all around me!
I know, I said no excuses….
However, it’s September now, and normality is staring to set in. My mouse has her first day back at pre-school and whereas nine months ago this would have rendered me a blubbing, snotty nosed mess, I am now relishing sitting here at the dining room table (which after months of absence has now regained its place in the living room, albeit amidst piles of wood and a massive mitre saw!) enjoying the silence and looking forward to writing my first blog post in months!
And believe me, this project deserves a blog post. Hell, it probably deserves an entire thesis! I would say that the Hualpa Kimono by We Are Knitters is the most challenging thing I’ve ever knit and I came so close to giving up on it so many times. I fell in love with this kit on my first visit to the We Are Knitters website but since I’d never even knit a jumper and the kit was labelled “Advanced” I decided to hold off from buying it until I’d gained some more knitting experience. I’m so happy I did, had it been one of my first projects, in my ensuring frustration, I would probably have given up on the whole knitting adventure. This April, with a years worth of knitting knowledge accumulated, I thought I was finally ready to handle it. After all, it really is just 3 rectangles, knitted in stockinette stitch sewn together. With a couple of colour changes thrown in. How hard could that be?


Well, it turns out that its very hard!
First of all it’s not very clear as to wether this is an Intarsia or a Fair- isle project. It’s probably not even that important but because I’ve never done stranded or colour change knitting, I wanted to look up some videos on how to do this and didn’t really know what to look for. The video We Are Knitters suggest watching wasn’t really that useful either as I don’t knit English style. Eventually I found this video which I used to get started and then made the rest up as I went along. Initially I would hold both coloured yarns in my right hand and swap them over as and when required. I know you can knit with two colours like this but I never got into a rhythm like this and my tension was off as well so eventually I just bit the bullet and decided I needed to learn how to knit English style so that I’d be able to hold one strand in each hand. Ultimately this wasn’t as difficult as I feared and eventually it even became quite automatic.
The next big challenge, at least to me, was getting the pattern right. The instructions come with a chart which shows you what stitches need to be knitted in what colour. It was my first time working iff such a large chart and it requires a lot of concentration. I had to restart or undo rows sooooo many times because I would find random stitches knitted in the wrong colour. After undoing my work for literally the 20th time I would spend a minute just checking every row after I had knit it to make sure the there were no mistakes. At least that way if there where any, I would only need to undo one row and not 10! This meant that this was NOT a very portable project, I couldn’t knit whilst also watching TV or playing with my daughter and I found that frustrating as I was desperate to finish it in time for the summer and our holidays.

So those were the challenges! Now what about the kit and the design?
Most of you have gathered I am a HUUUGE We Are Knitters fan. I love their yarns, their branding and the modern edge they give knitting. This is one of their earlier kits and I do think some improvements could be made. Firstly, the needles they provide with the kit (which I didn’t purchase) are just straight wooden needles. I think this is misleading as this project should really be knitted on circulars using a long cable (100cm for the back and 80cm for the sides) because you need to be able to lay your work out flat to spot mistakes and check the tension of your work. That’s not really a biggie as the kit is labelled advanced so most knitters would probably figure this one out by themselves. I used metal circular needles and I wish I had invested in some wooden needle tips as the last thing you want is your yarn sliding around when knitting with two colours! Secondly it wasn’t really made clear if you had to catch the yarns of the opposing colour when they weren’t being used or leave them long. I tried both ways but decided to leave them long as my stitches turned out neater on the right side when doing it this way.
There were two issues I found even more annoying than the two mentioned above. The first was the design of the front panels and the second was the sizing. The two front panels are supposed to have triangles in the contrasting colour running vertically down the side as in the photo below:

However, despite watching hundreds of videos and trying countless methods, I just couldn’t find a way of doing this so that the triangle wouldn’t slide about. That first stitch needed to be anchored to something to keep it in place. On Instagram I had seen a lot of knitters had inserted a vertical stripe running parallel to the straight side of the triangle and I hadn’t figured out why they had done this. I think it is because they were having the same problems as me and needed an anchoring stitch to keep the triangle in place. I’ve made a little video to just explain this a bit better. I think if you are knitting the Hualpa Kimono and you’re at this stage you’ll understand what I’m on about!

My second concern was with the sizing. I have mentioned before that We Are Knitters garments often come out VERY short (and this coming from someone who is only 153cm tall!) and the Hualpa Kimono is no exception. Looking at photos on Instagram I realised this would be an issue with this project as well. I didn’t know how I would resolve this: I didn’t really want to prolong my torture and knit an extra round of the pattern and I didn’t want to go up a needle size either so again I turned to the internet for help. On Instagram I had seen one Hulapa Kimono that seemed longer than all others despite having the same number of pattern increases. I checked out her blog which you can also do by clicking here but because it’s in Spanish I’ll share her secret: instead of conventionally blocking the finished Kimono on a flat surface, you need to soak it and then, without wringing it or squeezing out any water, you need to hang it to dry. It definitely increased mine lengthwise and it also really neatened out the stitches as you may be able to tell by comparing my progress shots with the finished piece. However, it’s still not exactly long on me and I would recommend adding in an extra repetition of the pattern if you are taller than 160cm.
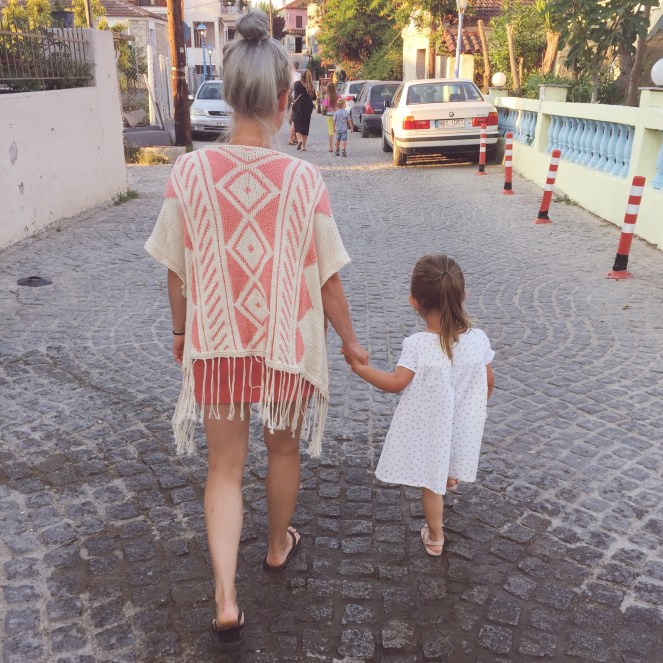
Eventually, despite all my problems, I did finish it and I am very happy with it. Aesthetically the design is beautiful, it’s just the right mix between modern and vintage and it instantly transforms an outfit into a showstopper. I really hope you won’t be put off by my problems – just use them to prepare yourself. I’m so pleased I stuck with it and invested so much time and effort, I’ve learnt so much and have such a unique item that I love and will continue to wear for a long time to come!!


Wow! This is amazing! How long did it take you to make?
LikeLike
Ahh thank you!! It took around a month but I was working on other, more simple projects at the same time to give myself a break!!
LikeLiked by 1 person
Hello! I am currently working on this project and I am running across some of the same issues you mentioned. I am trying to make 3 (mom, sister, and me) in a different accent colour each and I have to say this is the most ambitious project I have attempted and I have had to undo and restart. I’ve even learned how to reverse my casting now (yay!) so it’s not all for nothing. But I am definitely noticing that some of my connection points in the colour change don’t look as nice and I”m sort of hoping that the blocking will help. Did you pin down to block at all or just purely hang it? Would that not make the piece droop?
LikeLike
Hi, it definitely is a challenging project and I have so much respect for you making 3! I purely hung it because I found that making it to the pattern specifications it came out really short. If you search the hashtag #hualpakimono on IG you‘ll see that It does come up very short. So yes it did stretch out a lot when I hung it to block but it just meant it was the length I wanted it to be. Good luck!
LikeLike