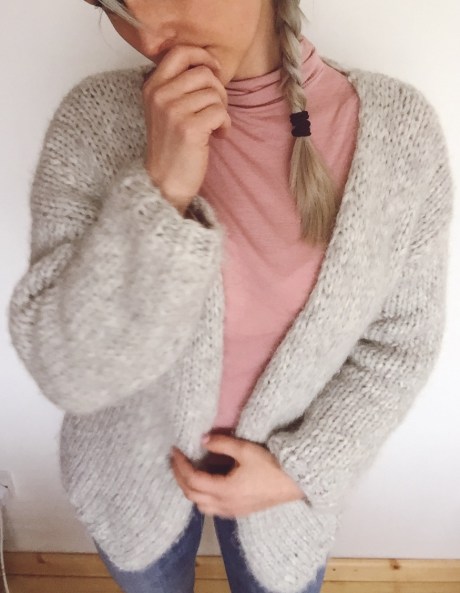
After falling in love with the oversized mohair cardigan I had made my mama for Christmas I decided I needed one for myself!
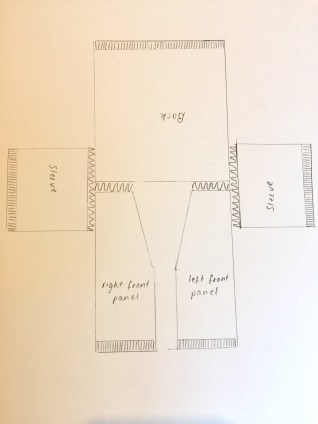
On Instagram, I had been admiring the photos filed under the #bernadettecardigan and wanted to create my own. Like the pret-a- fair Mohair Cardigan, the Bernadette cardigan consists basically of 3 rectangles (the back and two sleeves) and two rectangles with contrasting slanted edges for the two front panels. All pieces are then sewn together.
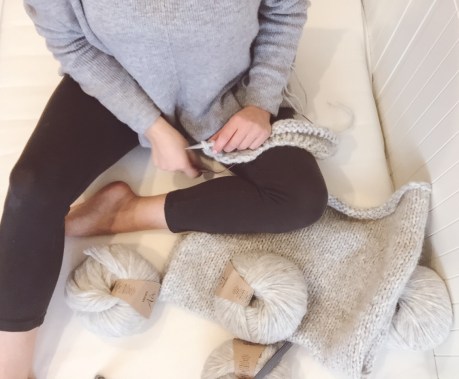
Sorry for the bad quality but I’m totally useless when it comes to technology!
I had already decided to use Drops Air yarn after admiring its softness and warmth when knitting hats as Christmas presents. I wanted the big stitch look of the Bernadette cardigan so I used it double threaded. I used about 7 x 50g balls to make my cardigan. I was really lucky as using 10mm needles my gauge was 10 stitches and 10 rows for a 10 x 10cm square. This is the part I used to find really confusing when I first started knitting but basically what this means is that, in the case of my cardigan, 1 stitch equals 1cm. This made calculating how many stitches I needed to cast on really easy. I used a cardigan I already had and measured the back and two side panels for size. My side panels needed to be 30cm and the back 60cm wide, so i needed to cast on 30 and 60 stitches respectively. This is how I then proceeded to knit the cardigan.
Needles: 9mm and 10mm
Yarn: Drops Air (350g)
Gauge: 10 stitches and 10 rows for a 10 x 10cm square
For all parts I used the English slip stitch as my border stitch to create an even plait along the selvage. To use this finish, on all rows you need to slip the first stitch of the row purl wise and knit the last stitch .
Back
Cast on 44 stitches using 9mm needles (we are creating the ribbed band which needs to be tighter than the body of the cardigan hence the smaller needles and fewer stitches)
Knit 4 rows in 1 x 1 ribbed stitch (knit one, purl one)
Row 5, change to 10mm needles: Knit 2, make one (you make one by lifting the string between two stitches onto the left needle and then knitting it through the back loop) knit 2 make 1, knit 2 make 1, knit 2 make 1, then knit 3 make 1 until only 6 stitches remain. Knit 2 make 1, knit 2 make one, knit 2. You should now have 60 stitches on your needle.
Continue knitting in stockinette stitch until you reach the desired length, cast off loosely.
Right Front Panel
Cast on 22 stitches using 9mm needles.
Knit 4 rows in 1 x 1 ribbed stitch (knit one, purl one)
Row 5, change to 10mm needles: *knit 2 make one*, repeat * until 3 stitches remain, make one knit 3. You will now have 30 stitches on your needle. Continue knitting in stockinette stitch.
Row 33, begin neck opening decreases. Knit 1, knit two together through the back loop, knit the rest of the row as normal.
Row 37, 41, 45, 49, 54 repeat row 33. You will now have 34 stitches on your needle. Carry on knitting until the front panel measures the same as the back. Cast off loosely.
Left Front Panel
Cast on 22 stitches using 9mm needles.
Knit 4 rows in 1 x 1 ribbed stitch (knit one, purl one)
Row 5, change to 10mm needles: *knit 2 make one*, repeat * until 3 stitches remain, make one knit 3. You will now have 30 stitches on your needle. Continue knitting in stockinette stitch.
Row 33, begin neck opening decreases by knitting the row as normal until only three stitches remain on your left needle, knit two stitches together knit one.
Row 37, 41, 45, 49, 54 repeat row 33. You will now have 34 stitches on your needle. Carry on knitting until the front panel measures the same as the back. Cast off loosely.
Arms (make 2)
Cast on 30 stitches using 9mm needles.
Knit 4 rows in 1 x 1 ribbed stitch (knit one, purl one)
Row 5, change to 10mm needles: knit3 make 1, k3 m1, k3 m1,k3 m1, k2 m1, k2 m1, k2 m1, k3 m1,k3 m1, k3 m1, k3. You will now have 40 stitches on your needles.
Continue in stockinette stitch until the desired length has been reached. Cast off loosely.
Join all pieces together as shown on the diagram using a mattress stitch or joining method of your choice.


So that’s it! I would just like to add, I was kind of just winging it when I was knitting this cardigan – there was a lot of trial and error involved – the first time I sewed it all together, I tried it on and realised it was way too long for me so I had to undo the whole thing, unravel at least 10cm off the back and side panels and then sew it all up again! I also wasn’t planning on writing out a pattern for it as 1. I’ve never written a knitting pattern before (eek!) and 2. I don’t know how to write a knitting pattern! But quite a few people got in touch with me on Instagram asking me how I’d knit my cardigan so I though I’d give back some of what I take from the online knitting community and write down my process. If I haven’t put you off and you do want to follow my exact instructions please note that they haven’t been tested so if you knit in a different style to me yours may come out differently. I knit in what is called the eastern uncrossed style which is almost identical to the continental style of knitting except for when I purl I wrap hook the yarn under instead of over my needle. This means that when I then go to knit the stitch sits differently on my left needle. The only part where this may cause you problems is when you do the decreases – I have tried to write it for continental knitters but if the decreases don’t look right to you then I’ve obviously overestimated my capabilities so just google left or right leaning decreases and go with that! Also just as an indication of size, I’m 153cm short and a dress size 8 or S.
Whilst I’m very happy with how mine turned out and have pretty much worn it every other day since I finished it (it’s sooo warm and fluffy!) there are some things I’ll do differently next time. The first thing is yarn choice – whilst Drops Air has rocketed up my list of favourite yarns, used double it didn’t have the lovely chic drapey-ness (is that a word?) of the mohair and that I was hoping to imitate. For my next one I will try using Drops Brushed Alpaca Silk held double. Also I would have liked an even more extreme oversized look, especially on the arms so I think I will increase the back panel by 5cm and the side panels by 2.5cm and the arms by (get ready for this) 10cm! If you have a look at the German knitwear brand Maiami Berlin you’ll see the jumbo sleeves I’m talking about.
Hope this post has made at least some sense and if it inspires you to knit something similar I’d love to see the results!
Happy Knitting!!